

Part 6 – Installation and configuration of Software Update Services (Sus)
As part of the management of patch, Microsoft has developed the software update services that can be downloaded for free from the Internet. The meaning and purpose of Sus is to manage a local refresher server that loads the updates provided by Microsoft from the Internet and distributes the clients available in the LAN. In the meantime, it is called Windows Server Update Services (WSUS).
As an administrator, full control is obtained on when customers should (should) install), because the distribution takes place through the group directive.
But in turn:
At the beginning there is always the download. Pupil software can be downloaded from. The processing of the procedure described in the article is actually addressed only to DSL users with a fixed frequency: the 33 MB installation for the server on itself would also be justifiable with ISDN, but the> 2 GB of patches that the Sus server is therefore loaded, but no longer.
A prerequisite for installation (according to the official Microsoft information) is a Windows 2000 or Windows 2003 server with IIS installed (Internet Information Server).
With some tricks, the Sus server can also be installed and managed on a notebook under XP, for example, in order to always have all the current patches with you and, for example, friends on the net can quickly provide the order.
This is why a separate article will appear, as it would go beyond the picture of this article.
Back to the subject:
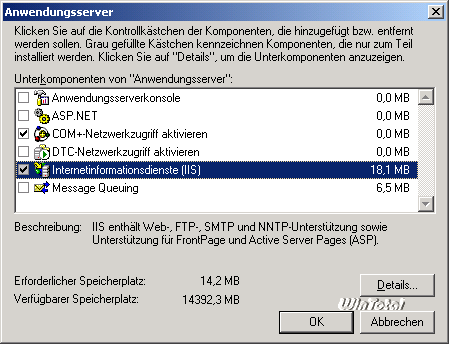
After downloading, the installation follows: IIS is a basic requirement for the server up, we must first install it. Then insert the Windows 2003 CD server and use Start => Control Panel => Software => Add/Remove components => Server applications => Install iis.
|
|
IIS Install |
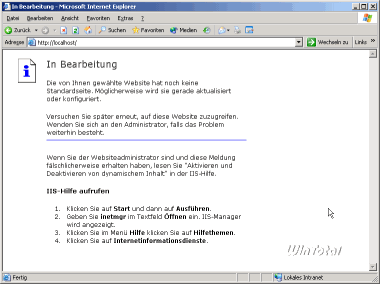
After installing IIS, we check if it is performed correctly. Just open the browser and insert it in the addresses line. It should seem like this:
|
|
IIS installed correctly |
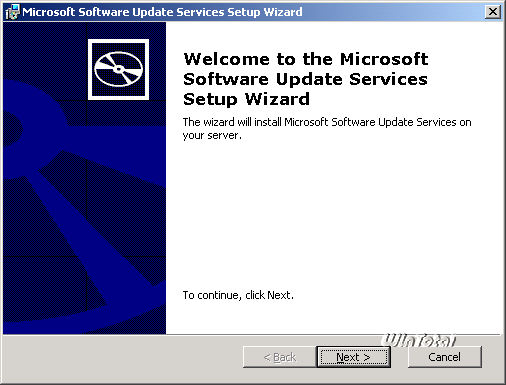
Now we can start installing the Sus server, just double click on the Exe file, which extracts the package and start the installation.
|
|
Install pupils |
Select «typical» in the installation dialog and click Next, the rest transforms itself, the Sus server is installed on unit C: in the Sus directory and also saves the updates there, the administration interface below /wwwroot.
If you want to insert other values here, you can do it by choosing «personalized» during installation. This is recommended, for example, if you only thought about C: only as a system partition and database, for example, on the unit D: lie.
The completion of the installation is displayed from this dialog box, here you can also see the name by which the name of the refresher server will subsequently be accessible.

|
|
Install pupils |
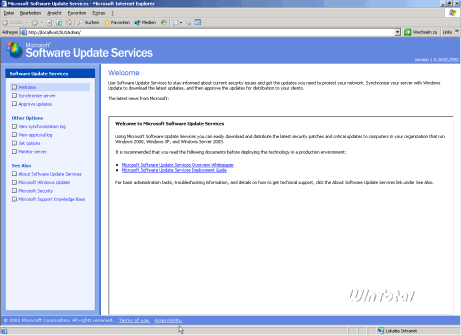
After clicking on «Finishing», the server administration surface on automatically starts:
|
|
Administrative surface of the Sus server |
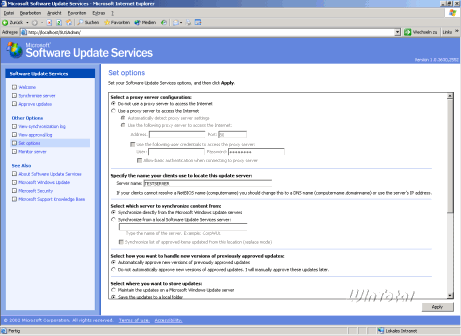
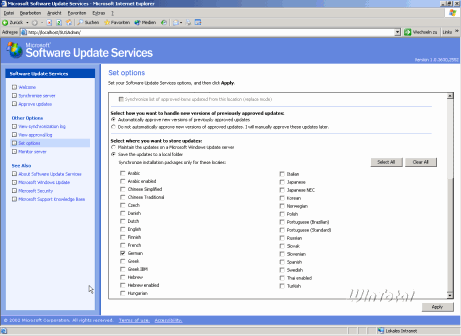
Now click on «Set options» to configure the server for your network. The dialogue is quite long, so two images of how it could/should appear:
|
|
Administrative surface of the Sus server |
|
|
Administrative surface of the Sus server |
Detail settings:
- Select a configuration of the proxy server:
If you use a proxy server for Internet access, insert it here (if necessary with authentication). - Specifies the name that clients use to identify this refresher server:
Here you give the name according to which the clients on the net will find the server later. In principle, it is not necessary to change anything here, the Netbios name of the server is already here. - Select which server synchronize the content:
Here it is set if the updates should be designed directly by the Microsoft servers or by another server of pupils that already exist in the LAN. Here it is set «directly from Microsoft»: there is no more servers on our LAN. - Select how you want to manage new versions of updates previously approved:
Microsoft provides correct versions of patches already published for download: here you can now set if these versions should be installed automatically or if you want to release them manually. Automatic release is recommended («automatic approval»). - Select where you want to store updates:
Here it can be set if the SUS server downloads updates themselves and archives local or access to client to the MS servers should be performed directly. The latter would generate unnecessary data trafficking, since each client downloads again from Microsoft, then we choose «Save updates to a local folder».
In addition, the linguistic versions of the updates to download can be determined here, by assume that the German systems, the «German» hook is sufficient (for example, the .NET framework is downloaded in all languages regardless of this setting).
At the end of the configuration, we click on «Apply» at the bottom right to save the settings made.
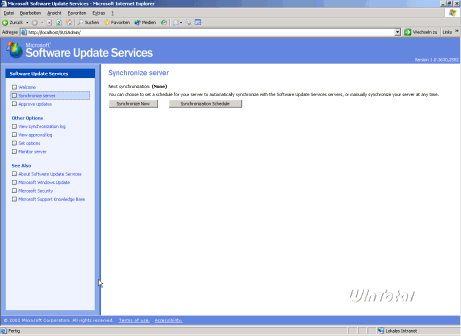
Now that the server is configured, we can start with the first download. As already mentioned at the beginning, these are currently> 2 GB, so it may take some time. To do this, we click «Synchronize the server»:
|
|
Administrative surface of the Sus server |
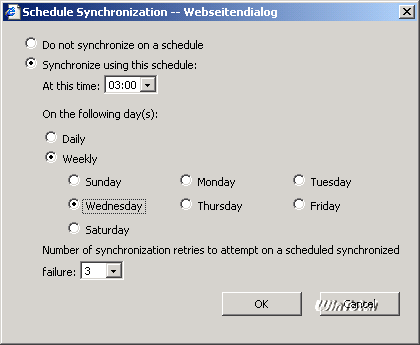
«Synchronize Now» starts an immediate synchronization process with Microsoft, «synchronization program» allows you to plan synchronization. Now we are organizing a plan when the updates of our Sus server should load from the network. Since Microsoft has «Patchday» once a month, that is always on the second Tuesday of a month, we choose «weekly» and «Wednesday».
|
|
Plan the program |
Since our server works around the clock and we do not want to play the Internet line with the download of updates, 03:00 is a good time for these downloads. The setting of three new attempts in synchronization errors should also remain.
To immediately synchronize the server, now we click «synchronize now» and wait for the server to download all the updates.
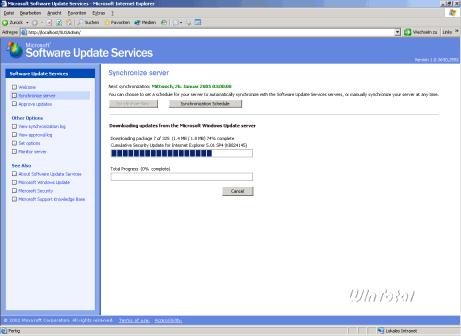
|
|
Synchronize with Microsoft Server |
After all updates have been downloaded, the Sus server issues a corresponding message:

|
|
Final report after the synchronization process |
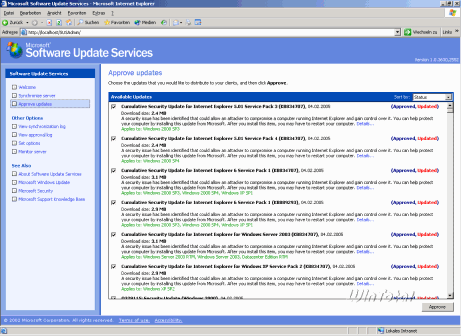
After clicking on OK, we reach the «let's approve the updates» page; Here we can now decide which updates are released for installation (approved).
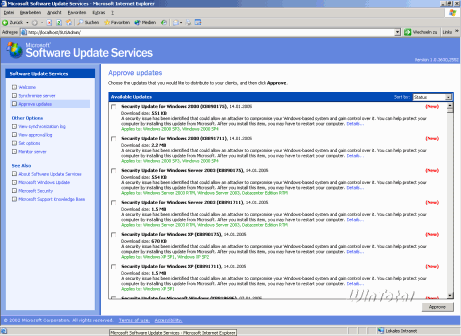
|
|
Approve updates |
In our case, we should first mark all the existing updates, given the mass of the updates available after the first synchronization, it would be inactive to click all the updates individually, so we help ourselves to a small tool: AutoApproveUpdates.VBS
The configuration of the script is autoesplative, the script is recalled via the command line (I inserted the script in the C: Susautopprove directory):
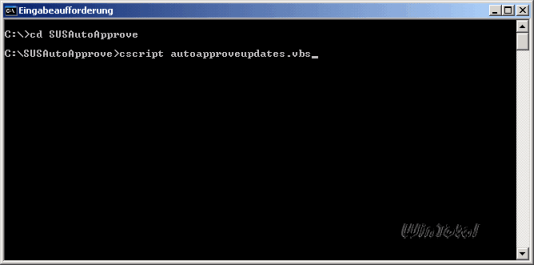
|
|
Approve a script |
|
|
Approve a script |
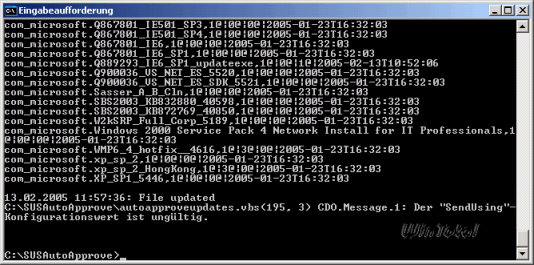
After performing the script, the «approve update» page of our server suspended as follows as follows:
|
|
Updates assigned |
All updates are therefore released, now we deal with customers on the net also download these updates from our Sus server. To do this, we use the functionality of the group guidelines, which is available in the form of the Wuau.adm model.
To do this, we open the GPMC and create a new GPO with the name Susupdates, which we use the right button => Edit for the CRO editor.
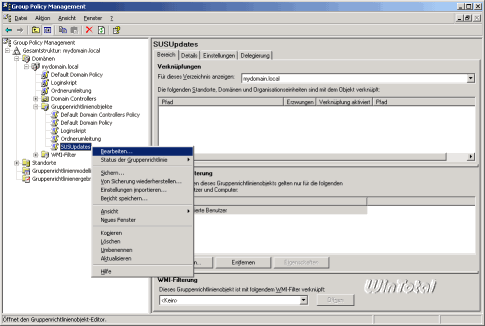
|
|
Editors of CRO objects |
Now we sail in the left tree on computer configuration => administrative models => Windows Components => Windows Update and Double Click on the upper item «Configure automatic updates». The configuration options are explained in the «explanation» tab, so Salvo at this point.
My favorite setting can be seen on the screenshot:
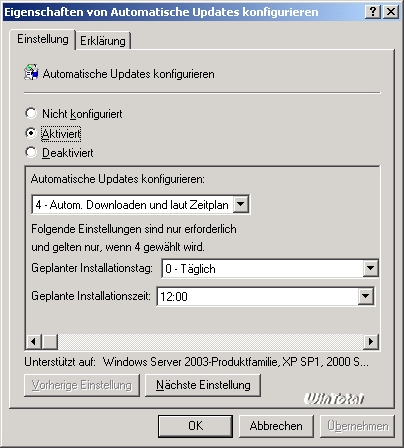
|
|
Group directive settings |
After clicking on «Take Over» and «Next setting» we reach the next configuration point, here the name of the Sus to be used server is determined. Please note that pupils work with the Netbios name or with the IP address, but not with an FQDN.
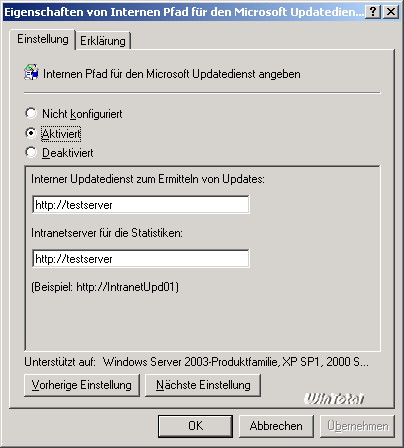
|
|
Group directive settings |
The next configuration dialogue therefore seems to be this:
|
|
Group directive settings |
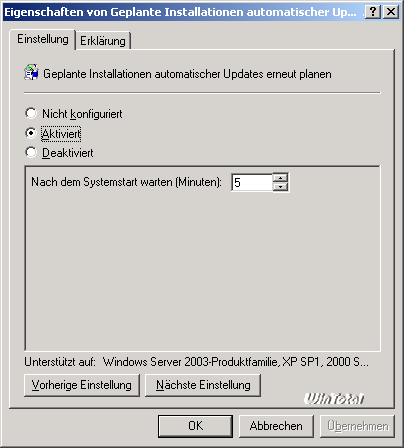
And the fourth and last like this:
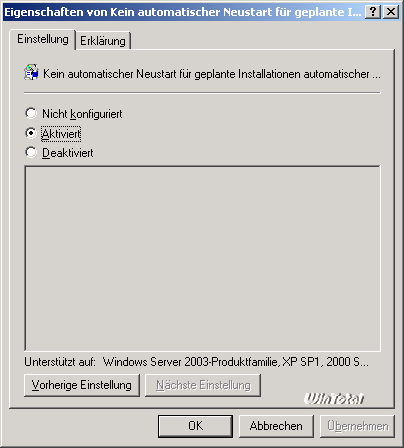
|
|
Group directive settings |
With this here it is important to know that deactivation can lead to data loss, since a user who has only «users» rights on a computer cannot stop automatic restart.
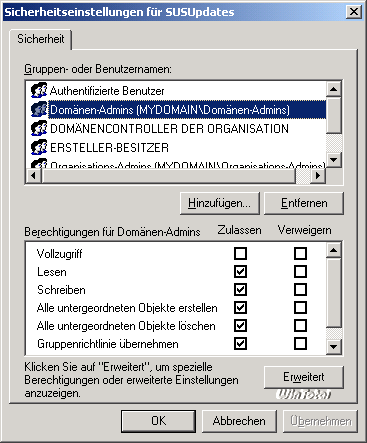
We finish the configuration with a click on OK and close the CRO editor. Since the standard discount for this CRO object is currently valid, only users, but not domain administrators, would take this guideline, which means that the server itself is not updated.
To change this, we call the delegation dialog in GPMC:
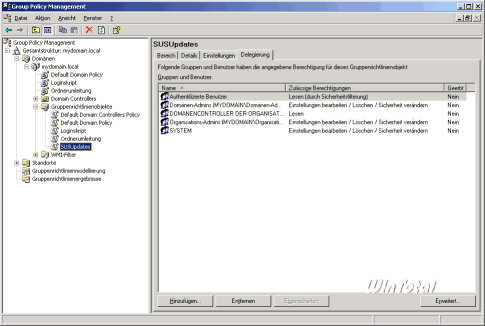
|
|
Take the check of the credit object for the Domain Administrator |
One click on «Advanced» provides us with the settings of those who take over on this object of ideas and who not, here we put the hook to the «group group directive» in the «Domain Admin» group.
|
|
Take the check of the credit object for the Domain Administrator |
This completes the configuration for the automatic installation of updates, both the clients and the server should now charge these new settings after a restart and then install updates.
The website offers some good tools to manage and monitor a pupil server, including their tools, which the client loaded and installed by the pupil server when the update, etc.
Since the system requirements are several here as users' desires, what should now be monitored, at this point not to present the tools – this would also do a significant leap in the context of the article.
There are 2 suggestions from the Punta Winttal archive.
(35 votes, media: 4,80 out of 5) Loading …

![]()
latest posts published

5k player-love of another audio/video reader

Search Lookeen 10 desktop replaces Windows Search

How to improve battery life in Samsung Galaxy S6

The perfect game pc in the test – What should really be able to do

How many cups of the CPU really need it

What is the modern configuration guest?

Why do memory stick folders appear as shortcuts?

O & O & Partitionation Particione Profession in version 3

How to find the right calendar app
